


Soldering 101: A Step-by-Step Guide to Joining Components
Soldering, a fundamental skill in the world of electronics and DIY projects, is the art of joining two or more electrical components together using a material known as solder. Soldering 101: A Step-by-Step Guide to Joining Component , Whether you’re building a robot, repairing a broken circuit board, or creating , soldering is a versatile technique that opens the door to countless possibilities. In this comprehensive guide, we’ll take you through the basics of soldering, step by step, to help you master this essential skill.
What Is Soldering?
At its core, soldering is the process of melting a low-melting-point metal alloy, known as solder, and using it to join two or more metal components. Solder typically consists of a combination of tin and lead (although lead-free solder is widely used for environmental and health reasons).
Why Soldering Matters
- Circuitry: In electronics, soldering is used to connect components on circuit boards, ensuring reliable electrical connections.
- Repairs : It’s indispensable for repairing electronic devices, from smartphones to home appliances.
- Hobbies and Crafts : Soldering is used in various hobbies and crafts, such as jewelry making, model building, and stained glass work.
- Plumbing : In plumbing, soldering is employed to join copper pipes securely.
- Automotive : It’s used in automotive repairs and modifications.
Soldering is a crucial skill for several reasons:
Now, let’s dive into the step-by-step process of soldering.
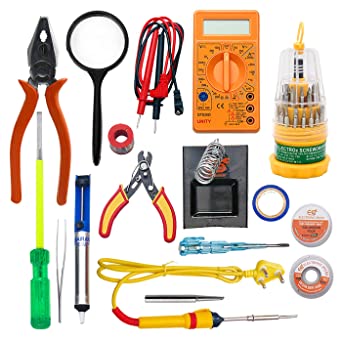
Step 1: Gather Your Tools and Materials
- Soldering Iron : The heart of the soldering process, it heats the solder to create a liquid state for joining.
- Soldering Iron Stand : To hold the hot soldering iron safely when not in use.
- Solder : Choose the right type of solder for your project, such as lead-based or lead-free solder.
- Sponge or Brass Tip Cleaner : For cleaning the soldering iron tip during use.
- Safety Glasses : To protect your eyes from hot solder and debris.
- Ventilation : Soldering produces fumes, so work in a well-ventilated area or use a fume extractor.
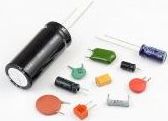
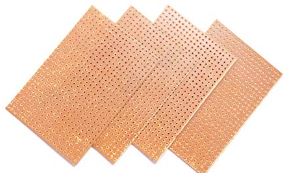
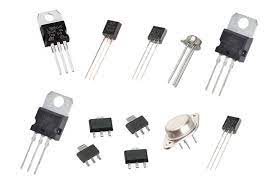
- Components to Solder : The parts you want to join.
- Solder Wick or Solder Sucker (optional) : For removing excess solder or desoldering.
Before you begin, ensure you have the necessary tools and materials ready:
Step 2: Prepare Your Work Area
Set up a clean, clutter-free work area with good lighting. Ensure your soldering iron is properly grounded, and there’s a suitable surface for resting it safely when not in use. Always work on a non-flammable surface, such as a heat-resistant soldering mat.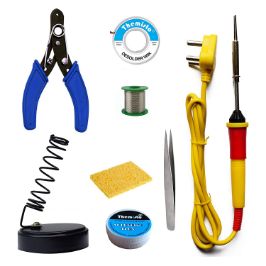
Step 3: Safety First
Safety is paramount when soldering. Wear safety glasses to protect your eyes from hot solder splatters. Be cautious of the hot soldering iron, and never touch the tip when it’s hot. Always unplug the soldering iron when you’re done with your work.
Step 4: Heat Up the Soldering IronPlug in your soldering iron and allow it to heat up to the appropriate temperature for your solder and components. Different solders have different melting points, typically around 370°C (700°F). Be patient; it may take a few minutes for the iron to reach the desired temperature.
Step 5: Clean the Soldering Iron TipClean the soldering iron tip using a damp sponge or brass tip cleaner. This removes any oxidation and ensures good heat transfer to the solder. A clean tip is crucial for successful soldering.
Step 6: Apply Solder to the Tip (Tinning)Before soldering, “tin” the soldering iron tip by applying a small amount of solder to it. This helps improve heat transfer and ensures better solder flow.
Step 7: Position and Hold the ComponentsPlace the components you want to solder together in their desired position. Use a helping hand tool or a clamp to hold them steady if necessary. Soldering 101: A Step-by-Step Guide to Joining ComponentsEnsuring that the components are stable and correctly aligned is crucial for a strong and clean solder joint.
Step 8: Heat the JointWith the soldering iron properly tinned, carefully touch it to the joint you want to solder. The heat from the iron will transfer to the components and the solder, causing the solder to melt and flow into the joint.
Step 9: Apply SolderOnce the joint is heated, touch the solder to the joint, not the soldering iron. The solder should flow freely into the joint. You want to use just enough solder to form a good connection without creating excess solder blobs. Remove the solder wire cleanly to avoid drips.
Step 10: Let It CoolHold the components steady for a few seconds to let the solder cool and solidify. It’s important not to move the components during this time, as it can result in a “cold joint” with poor electrical connections.
Step 11: Inspect Your WorkAfter the solder joint has cooled, visually inspect it. A good solder joint should be shiny and smooth, with no cracks or gaps. If you see any issues, you may need to reheat the joint and add more solder or correct any misalignment.
Step 12: Clean UpTurn off your soldering iron and unplug it. Clean the iron’s tip one last time, and carefully store your soldering equipment. Dispose of any waste materials, such as used solder or cleaning sponges, properly.
Tips for Successful Soldering :- Practice makes perfect. Start with simple projects to build your soldering skills.
- Use the right soldering iron temperature for your components and solder type.
- Keep your workspace well-ventilated to avoid inhaling solder fumes.
- Don’t rush; take your time to ensure clean and reliable solder joints.
- Learn to de-solder using solder wick or a solder sucker, as it’s a valuable skill for fixing mistakes.
- Experiment with different soldering techniques.
This is all about Soldering 101: A Step-by-Step Guide to Joining Components
Buy Soldering kit at low cost in www.mifraelectronics.com
To learn more www.mifratech.com