


INTRODUCTION
- Attaching a heat sink to a Raspberry Pi is a simple yet effective way to manage its temperature and enhance its performance, especially during prolonged or intensive usage. Raspberry Pi, a versatile single-board computer, is often used for various projects ranging from hobbyist experiments to industrial applications. As the processor on the Raspberry Pi generates heat during operation, it’s essential to dissipate this heat efficiently to prevent thermal throttling, which can impact performance and longevity.
- A heat sink is a passive cooling solution commonly used to absorb and dissipate heat away from electronic components like processors. It typically consists of a metal block with fins or ridges that increase its surface area, facilitating the transfer of heat to the surrounding air. Attaching a heat sink to the Raspberry Pi’s processor helps in dispersing heat more effectively, thereby maintaining optimal operating temperatures.
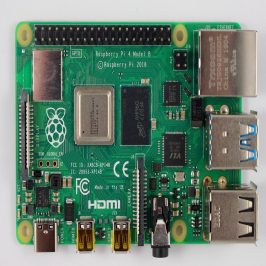
- Before attaching a heat sink, it’s crucial to identify the processor on your Raspberry Pi board. The Raspberry Pi boards usually have the processor located at the center, identifiable as a large rectangular chip. Once you’ve located the processor, follow these general steps to attach the heat sink:
Projects Categories:
Products Categories:
- Robotics
- Actuators
- Camera Modules
- Drone Kits
- Drone Components
- Chassis
- DC Motors
- Other Robotic accessories
- Pick and Place Modules
- Robotic Kit
- Servo Motors
- Stepper Motors
- Wheels
- Microcontrollers & Programmers
- 8051 Microcontroller
- Arduino Microcontroller
- ARM Development Board
- Interface Module
- NODMCU / ESP Modules
- PIC Microcontroller
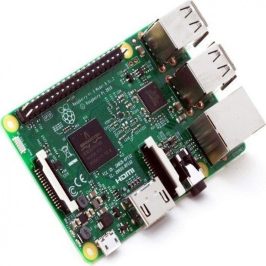
- Raspberry Pi
- Devices and Actuators
- Display Modules
- Sensors & Module
- Power Supply / Batteries
- Wireless modules
- Electronic Components
- Wholesale Market


Description
1. Prepare the Surface: Ensure that the surface of the processor is clean and free from any dust or debris. You can use a soft brush or a can of compressed air to gently clean the surface.
2. Apply Thermal Paste : Some heat sinks come with a thermal pad or thermal paste pre-applied. If not, you may need to apply a thin layer of thermal paste onto the surface of the processor. This paste improves the thermal conductivity between the processor and the heat sink, enhancing heat transfer.
3. Attach the Heat Sink: Carefully place the heat sink onto the processor, aligning it properly to ensure maximum contact. Apply gentle pressure to secure the heat sink in place. Some heat sinks come with adhesive backing for easy attachment, while others may require additional methods such as clips or screws.
4. Verify Secure Attachment: Once attached, ensure that the heat sink is firmly secured to the processor. Gently wiggle it to check for any loose connections. A properly attached heat sink should not move easily.
5. Test and Monitor: After attaching the heat sink, power on your Raspberry Pi and monitor its temperature during normal operation. You can use software utilities like vcgencmd on Raspberry Pi OS to check the CPU temperature. Ensure that the temperature remains within safe limits, indicating effective heat dissipation.
By following these steps, you can effectively attach a heat sink to your Raspberry Pi, providing better thermal management and potentially improving its overall performance and longevity, especially under demanding workloads.

Installing a heat sink on a Raspberry Pi 4
1. Gather Your Materials: You’ll need a few items:
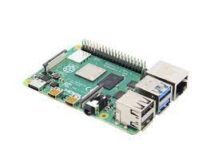
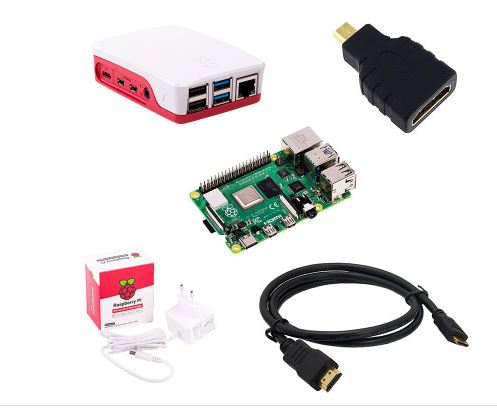
Raspberry Pi 4 board
Heat sink kit (typically includes a heat sink for the CPU and possibly additional heat sinks for other components)
Thermal paste (if not included with the heat sink)
2. Identify the Components: Locate the CPU on your Raspberry Pi 4 board. It’s the large rectangular chip near the center. This is where you’ll be attaching the main heat sink.
3. Prepare the Surface: Ensure the surface of the CPU is clean and free of any dust or debris. Use a soft brush or compressed air to clean it gently.
4. Apply Thermal Paste: Some heat sinks come with pre-applied thermal pads or thermal paste. If yours doesn’t, you’ll need to apply a small amount of thermal paste to the surface of the CPU. A pea-sized amount in the center of the CPU is usually sufficient.
5. Attach the Heat Sink: Carefully place the main heat sink onto the CPU, aligning it properly. Apply gentle pressure to ensure good contact between the heat sink and the CPU. If the heat sink has an adhesive backing, press it firmly onto the CPU. If not, you may need to use clips or screws provided with the heat sink kit to secure it in place.
6. Install Additional Heat Sinks : Some heat sink kits come with additional heat sinks for other components on the Raspberry Pi, such as the USB controller or Ethernet controller. If you have these additional heat sinks, follow the same process to attach them to their respective components.
7. Check for Secure Attachment: Once all the heat sinks are attached, gently wiggle them to ensure they’re firmly secured. If any of them feel loose, double-check the attachment method (adhesive, clips, or screws) to ensure a secure fit.
8. Power On and Monitor: Power on your Raspberry Pi 4 and monitor its temperature during normal operation. You can use software utilities like `vcgencmd measure_temp` on Raspberry Pi OS to check the CPU temperature. Ensure that the temperature remains within safe limits, indicating effective heat dissipation.
Following these steps will help you properly install heat sinks on your Raspberry Pi 4, improving thermal management and potentially enhancing its overall performance and longevity, especially under heavy workloads.
Identifying the hot components on a Raspberry Pi 4
CPU (Central Processing Unit): The CPU is the primary processing unit on the Raspberry Pi 4. It’s responsible for executing instructions and performing calculations. The CPU on the Raspberry Pi 4 is located centrally on the board and is one of the main sources of heat generation, especially during intensive tasks like gaming or video playback.
GPU (Graphics Processing Unit): The GPU on the Raspberry Pi 4 handles graphics processing tasks, including rendering images and videos. While the GPU on the Raspberry Pi 4 is relatively efficient, it can still generate heat during tasks that require significant graphical processing, such as gaming or multimedia applications.
RAM (Random Access Memory): While not a major heat source compared to the CPU and GPU, the RAM modules on the Raspberry Pi 4 can contribute to overall heat generation, especially during memory-intensive tasks. The RAM modules are typically located near the CPU on the Raspberry Pi 4 board.
USB Controller: The USB controller manages the USB ports on the Raspberry Pi 4, allowing you to connect peripherals such as keyboards, mice, and storage devices. The USB controller can generate some heat, particularly when multiple USB devices are connected and transferring data simultaneously.
Ethernet Controller: The Ethernet controller handles the wired network connection on the Raspberry Pi 4. Like the USB controller, it can generate heat, especially during network-intensive tasks such as file transfers or streaming.
Power Management Circuitry: The power management circuitry on the Raspberry Pi 4 regulates the voltage and current supplied to the various components on the board. While not as significant as the CPU or GPU, the power management circuitry can contribute to overall heat generation.
Choosing the right heat sinks for your Raspberry Pi 4
1. Size and Form Factor: Ensure that the heat sinks you choose are compatible with the Raspberry Pi 4’s form factor and layout. The main heat sink for the CPU should cover the entire processor chip, providing maximum surface area for heat dissipation. Additionally, if you plan to install heat sinks on other components such as the USB or Ethernet controllers, make sure they fit within the available space on the Raspberry Pi 4 board without obstructing other components or connectors.
2. Material: Heat sinks are commonly made from aluminum or copper. Both materials have excellent thermal conductivity properties, but copper generally offers slightly better performance. However, aluminum heat sinks are more lightweight and cost-effective. Choose heat sinks made from high-quality materials to ensure efficient heat dissipation.
3. Fins and Surface Area: Opt for heat sinks with fins or ridges on their surface, as these features increase the effective surface area for heat dissipation. Heat sinks with larger surface areas can dissipate heat more effectively, helping to keep the Raspberry Pi 4’s temperature in check during demanding tasks.
4. Adhesive vs. Thermal Tape: Some heat sinks come with adhesive backing or thermal tape for easy installation, while others require additional methods such as clips or screws. Adhesive-backed heat sinks are convenient for quick installation but may be less secure over time. Consider your preference and the level of permanence you desire when choosing between adhesive-backed or mechanically attached heat sinks.
5. Additional Features: Some heat sinks may come with additional features such as fans or heat pipes to enhance cooling performance further. While these features can be beneficial for intensive tasks or overclocking, they may also increase the overall size and cost of the heat sink. Evaluate whether these additional features are necessary based on your usage requirements.
6. Compatibility with Cases: If you plan to use a case with your Raspberry Pi 4, ensure that the heat sinks you choose do not interfere with the case’s installation or airflow. Some cases may have specific compatibility requirements for heat sinks, so check the manufacturer’s specifications before purchasing.
7. Budget: Consider your budget when selecting heat sinks for your Raspberry Pi 4. While high-end heat sinks with advanced features may offer superior cooling performance, they may also come at a higher cost. Choose heat sinks that strike a balance between performance and affordability based on your budget constraints.
- By considering these factors, you can choose the right heat sinks for your Raspberry Pi 4 to effectively manage its temperature and optimize performance, ensuring stable operation under various workloads.
Ensuring Secure and Effective Contact
Ensuring secure and effective contact between the heat sink and the components of your Raspberry Pi 4 is crucial for optimal thermal management. To achieve this, start by preparing the surfaces of both the heat sink and the components. Ensure they are clean and free from any dust, debris, or residue that could hinder heat transfer. Use a soft brush or compressed air to gently clean the surfaces, taking care not to damage any delicate components.
- Next, if necessary, apply a thin layer of high-quality thermal paste to the contact surface of the heat sink or the component. Thermal paste helps to fill microscopic imperfections and air gaps, improving the thermal conductivity between the two surfaces. When attaching the heat sink, align it carefully with the component, ensuring maximum contact across the entire surface area. Apply gentle, even pressure to secure the heat sink in place, whether it uses adhesive backing, clips, or screws. Double-check the attachment to confirm that the heat sink is firmly seated and does not wobble. Performing these steps diligently helps to guarantee a secure and effective contact between the heat sink and the components of your Raspberry Pi 4, promoting efficient heat dissipation and maintaining optimal operating temperatures for sustained performance and longevity.
Conclusion
- In conclusion, quantum sensing is a transformative technology with profound implications across various fields. By harnessing the principles of quantum mechanics, quantum sensors offer unprecedented levels of sensitivity, precision, and functionality in measuring physical quantities. From medicine and healthcare to aerospace and defense, from telecommunications to environmental monitoring, quantum sensing finds applications in diverse domains, revolutionizing research, industry, and society.
- The applications of quantum sensing are vast and impactful. In medicine, quantum sensors enhance diagnostic imaging techniques like MRI, leading to better patient outcomes. In navigation and geolocation, they improve the accuracy of GPS systems, aiding in precise positioning and navigation. Telecommunications benefit from quantum sensors’ ability to secure data transmission through quantum key distribution, ensuring privacy and security in communication networks.
- Moreover, quantum sensors play critical roles in aerospace and defense, enabling advanced radar systems and precise navigation in aircraft and spacecraft. They contribute to environmental monitoring efforts by providing accurate measurements of climate parameters and aiding in natural disaster prediction. In the energy industry, quantum sensors optimize resource extraction and enhance the efficiency of renewable energy systems.
- Furthermore, quantum sensing facilitates advancements in materials science and nanotechnology, empowering researchers with tools for high-resolution imaging and nanostructure characterization. In finance and economics, quantum sensors support market analysis and risk management strategies, contributing to informed decision-making in financial markets.
- In addition, quantum sensing technologies have implications for entertainment, gaming, education, and research, enriching experiences, advancing knowledge, and driving innovation in these areas.
- Overall, quantum sensing holds immense promise for addressing complex challenges and unlocking new opportunities across various fields. As research and development in quantum technologies continue to progress, we can anticipate even greater advancements and applications of quantum sensing, further shaping the future of science, technology, and society.


For additional blog content, to explore further insights and articles. Click here
433MHz RF Module Works &
Working 433MHz RF Module Works & Interfacing With Arduino Introduction Wireless communication has become an...
Read MoreVoice Recognition Technology
Voice Recognition Technology Introduction Voice recognition technology, a groundbreaking innovation in the realm of electronics,...
Read MoreHow to attach heat sink
How to attach heat sink to raspberry pi 4 INTRODUCTION Attaching a heat sink to...
Read MoreUnderstanding Integrated Circuit And Microchips
Understanding Integrated Circuit And Microchips Introduction Integrated circuits (ICs), often referred to as microchips, are...
Read More